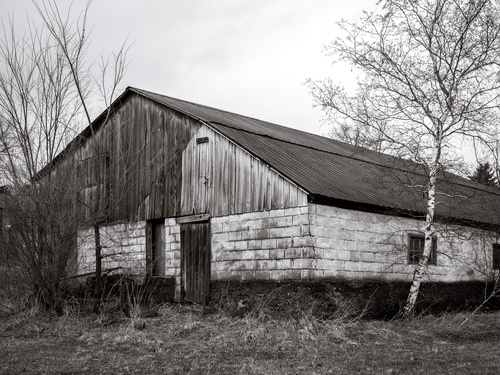
When I printed in the darkroom, I would usually take a piece of cardboard, and use it to block the light in a way that the edges of the print would receive additional exposure. This was called “burning in the edges,” and it would make the edges of the print slightly—almost imperceptibly—darker. Why did I do this? Well, because Ansel told me to. But the real reason is that our eye is drawn toward brighter parts of the print, and darkening the edges slightly keeps the viewer’s eyes from wandering out of the frame.
Friday, April 25, 2014
Thursday, April 24, 2014
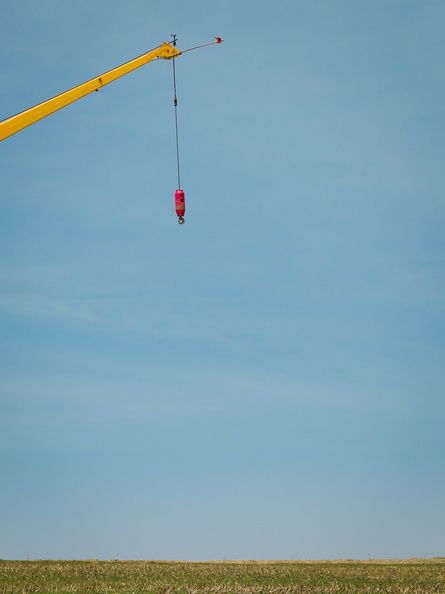
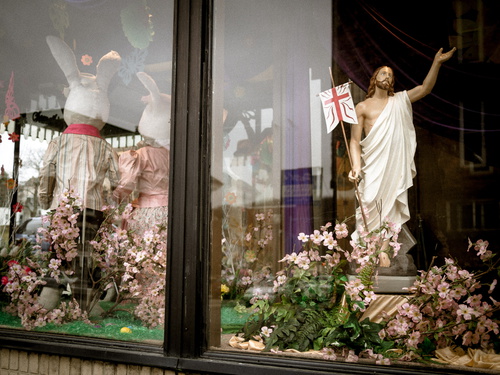
Freelensing

This evening I played around with freelensing—holding a camera lens in front of the camera without mounting it, so that you can tilt and move the lens around freely. Like a tilt-shift lens, this allows the plane of focus to be other than a vertical plane in front of the camera. Unlike a tilt-shift lens, it’s very hard to control precisely.
Sunday, April 20, 2014
Photo Tips for Mom: Querying keywords
Querying, or searching, your Lightroom catalog for photos with certain keywords is done in the Library module.
The search will work by narrowing down, or filtering, the displayed photos to show only those with a certain keyword. So we have to start by showing all the photos that we want to search. Use the panels on the left to choose your starting point. One common option would be All Photographs:

Once you’ve picked your starting point for the search, expand the Keyword List panel on the right side of the screen, and find the keyword you want to looks for. You can do this by expanding the tree, or by using the search box.
When the keyword you want to search for is visible, hover over it, and a right-facing arrow will appear:

Click the arrow, and your displayed photos will be filtered down to those that have the keyword. Note that anything underneath the selected keyword will be included, so searching for Birds will include American Robin.
Lightroom’s filtering capabilities extend beyond keywords. In the Library Filter boxes that appear at the top of the screen, you’ll see that you can filter on all kinds of parameters, such as the lens used. The filter panel will show four things to filter on, but you can change each of those by clicking on a search parameter:
To stop filtering, click None:

Photo Tips for Mom: Applying keywords
Lightroom has a number of ways to set keywords for photographs. Keywording is done in the Library module.
One Shot image-by-image recap
I wrote about a few images in depth, but for most I didn’t have much to say, and let the image speak for itself. Since the point of the project was to see if I could make a decent image with only one shot, though, I thought I should offer some opinions about how well each image succeeded.
Saturday, April 19, 2014
Photo Tips for Mom: The exposure triangle
There are three main camera settings that affect the exposure of your photograph. Each of them has side effects, in addition to their effect on exposure.
Exposure is measured in steps or (colloquially) stops, which are factors of 2 in brightness. For example, a difference of 3 stops is a difference of 2×2×2=8 in the amount of light.
Friday, April 18, 2014
Thursday, April 17, 2014

Wednesday, April 16, 2014

Tuesday, April 15, 2014

Monday, April 14, 2014

Sunday, April 13, 2014
Photo Tips for Mom: Aspect ratio
Aspect ratio is the ratio of the length of one side of an image to the other. The sensor in a digital camera (or the film format in a film camera) will have a “natural” aspect ratio determined by its size. For 35mm film, the aspect ratio was 3:2 (=1.5), and most DSLRs use the same. Some medium-format film cameras shoot square, or 1:1 (=1.0), images. Your E-PL5 has a 4:3 ratio, which gives the Micro Four-Thirds format its name. The 4:3 (=1.33) ratio is the same as “old-style” television, and is closer to square than the 3:2 (=1.5) DSLR ratio or the even wider 16:9 (=1.68) ratio of an HDTV.
Note: In some cases, people maintain the convention of keeping the horizontal dimension first (e.g. 4:3 for horizontal, or landscape, images, and 3:4 for vertical, or portrait, images). In other cases, they don’t, and think of aspect ratio as being independent of orientation (so a 4:3 aspect ratio could be in either landscape or portrait). Usually the meaning is clear from context.
While your camera has a natural aspect ratio, which is the starting point of your files, you can change the aspect ratio through cropping. The crop tool of Lightroom’s Develop module is accessed through the “dashed rectangle” icon above the Basic panel:

The crop tool lets you drag the border to crop the image. If the padlock icon is locked, the aspect ratio will be locked (so dragging a horizontal border also moves the vertical borders to maintain the aspect ratio, and vice-versa). If the padlock is unlocked, you can drag the borders independently, changing the aspect ratio.
In the Aspect drop-down, you can choose from widely-used aspect ratios like 4x5/8x10 (a common print size) and 2x3/4x6 (the famous 3:2 ratio of 35mm film and DSLR cameras). You can also add custom ratios and save them for re-use.
Why might we change the aspect ratio? There are a few reasons:
- As we’ll discuss in a future installment, photographic composition depends on exclusion as much as inclusion. If something is distracting, or doesn’t contribute to a scene, we often choose to exclude it. The decision to crop something out of the scene, while maintaining the elements we want to keep, may necessitate changing the aspect ratio.
- There’s a psychological component to aspect ratio. In horizontal (or landscape-oriented) photos especially, a wide aspect ratio can imply opennness, or a broad vista. It can create a dynamic space—for example, a space for the subject to look or move into. In contrast, a more square aspect ratio, like the 8x10 format, can feel intimate.
- Our eyes have a narrower vertical field of view than horizontal, so for vertical compositions, I feel that squarer aspect ratios, like the E-PL5’s natural 3:4, or even 8:10, work best.
And now, a rant: Lately, my Facebook feed is full of phone-camera shots in a 16:9 ratio, like HDTV. This is, presumably, the native sensor size of some phones these days. For horizontal compositions, 16:9 is sometimes a good choice. For vertical shots, however, it’s usually horrible. There’s typically a toddler’s head in the middle of the frame, and acres of pointless background above it. Whatever phone designer thought this was a good idea should be dragged out back and shot. If nothing else, the phone should default to cropping more square during vertical composition.
The conclusion: When cropping, don’t be beholden to your camera’s native aspect ratio. Try different aspect ratios to include or exclude the elements you want, and convey a sense of openness or intimacy to the scene.
Saturday, April 12, 2014

Photo Tips for Mom: The quality of light
Introduction: Many writers, especially tech writers, employ the “explain to Mom” trope in a patronizing way, with the implication that “Mom” is a bit dim. This is not the case for my new series. I am writing for my literal mom, who is an intelligent person who happens to be new to photography.
In accordance with Best Practices for Familial Tech Support, Mom is using equipment that I’m familiar with: An Olympus E-PL5 mirrorless camera with two lens kit, VF-3 electronic viewfinder, and Lightroom 5.
The natural tendency of new photographers is to see something beautiful or interesting, and photograph it, with the expectation that a good photograph will result. Often, the result is disappointing, and it’s because the light did nothing to improve the photo.
One Shot #38 | Museum
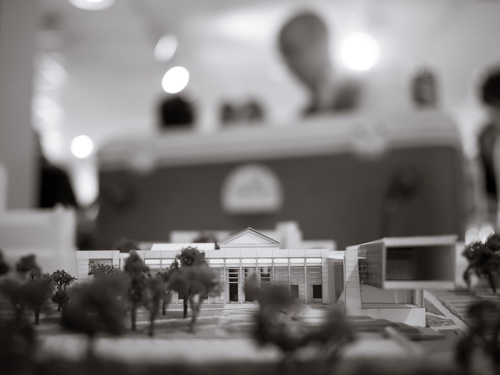
A model of the future Westmoreland Museum of American Art, taken at a happy hour at their temporary facility.
Confession: I also took some pictures of my mom and Jill at their request, and some test shots with my mom’s new-to-her camera. More on that later.
Thursday, April 10, 2014

Wednesday, April 9, 2014

Tuesday, April 8, 2014

Monday, April 7, 2014
Sunday, April 6, 2014

Saturday, April 5, 2014

Friday, April 4, 2014
Thursday, April 3, 2014

Wednesday, April 2, 2014

Tuesday, April 1, 2014

Subscribe to:
Posts (Atom)